
Dear Reader
Hello, old friend. I’m writing today to say thanks, and to say farewell. This will be my last column.
You know the feeling. You are in a tight crawlspace with a 20-foot crawl to the hatch. Or, you are on a rooftop, and have to climb down the extension ladder for a 3-block walk from where you parked your truck. You don’t have the right tool you need, but you have something close.
You really need a 5/16-inch nut driver, but all you have is a pair of Kleins. So, what do you do? Crawl out of the crawl space, climb out the hatch, and go to your truck for the right tool? Most likely, if you are like me, the answer is, "no." You first try to work with what you have, with predictable results.
You either strip the head off of the nut or the jaws slip and you skin the bark off of your knuckles. At least, that is what would usually happen to me. This is where a little patience would have been priceless. Take the time to go get the right tool and do the job the right way. If only I would ever learn this lesson.
Luckily for me, my lead tech, Brian Golden, has just about every tool you can imagine. And, he is skilled at using them. It is one thing to have the right tool, but another thing to have the knowledge, experience and skill to properly use the right tool. Let’s just say that Brian would never use a pair of lineman’s to try to loosen a nut. No, he would take the time to retrieve the correct tool from his arsenal required to make the repair.
Brian was recently at a client’s home in Washington, D.C. It is a c. 1900, 4-story row house in the Adams Morgan neighborhood. The house was originally heated by a coal-fired gravity hot water system connected to cast iron standing radiators. Many changes have been made over the years, along with several boiler replacements. We have serviced the existing 40-year-old Hydrotherm cast iron gas-fired boiler for the last 10 years.
The most significant change made to the system was approximately 40 years ago, when the basement was converted into an English basement apartment. The ceilings were already low, so the low-hanging gravity steel mains had to go. They were replaced with copper mains tight to the joists. At the time, it was not clear how the new copper mains were transitioned to the black steel risers feeding the upper floors. The basement was completely finished with all the piping behind the drywall ceiling. We soon found out how the connections were made.
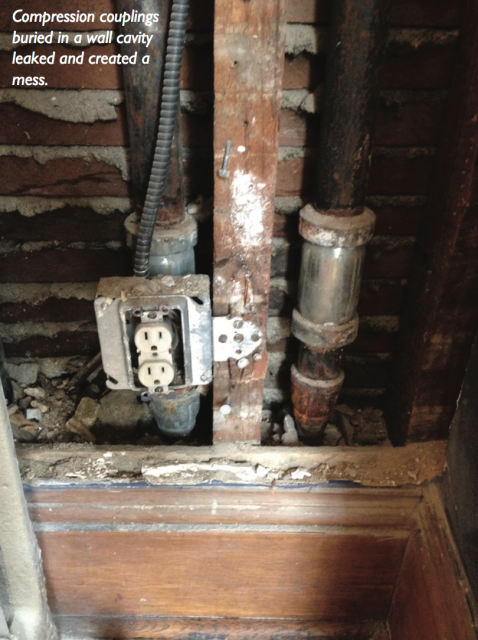
The owner called this summer and requested a service call. One of his radiators was leaking, causing the hardwood floor to buckle as well as the plaster wall to stain, pop and bubble. The drywall ceiling below was damaged as well. Brian quickly determined the cause of the problem. It was not a leaking radiator. The leak was from the hydronic piping in the wall.
The owner’s contractor opened up the plaster wall exposing the surprise. Dresser Couplings were used to connect the newer copper mains in the basement to the old steel risers. These are a type of compression coupling. I have seen them used on gas piping and on the fill and vent piping on oil tanks. I have never seen them used on hydronic piping. In this case, they leaked in the walls and created a mess. Since this occurred back in June, Brian drained the system and shut it down while we came up with a solution.
My first thought was to try to remove the riser by unthreading it and removing it. We could then try to thread in a copper riser with a male adapter into the black tee at the ceiling level. We decided that this was too complicated and would involve extensive cutting and patching.
My next thought was to thread the riser in place. In a pinch, I have had a helper lock two pipe wrenches onto a basement steel main while I used a Ridgid 12-R ratchet head threader to thread a pipe in place. It is not fun or easy, but it can be done. But I did this in an open basement, not in a tight wall cavity.
Brian vetoed the idea. It was not possible to thread the pipe in place without making an even bigger hole on the opposite wall. Even a handheld power threader would not work in this tight space. There was also the risk of snapping off the pipe at the ceiling level, due to the leverage and pressure put on the 10-foot riser.
Brian came up with what I thought was a brilliant solution. He cut the risers square with an angle grinder. He then cleaned up the raw steel pipe with a file and a champfer tool. He cleaned and sanded the pipe to bare metal. He used Viega MegaPress steel fitting to transition from 1-1/2 inch steel pipe to 1 inch copper. The MegaPress fitting slips over the bare steel pipe. A press tool with the correct jaws then applies 35,000 PSI of pressure on the fitting creating a tight, permanent connection. He completed the repair by tying into the copper mains in the basement using Viega Pro-Press copper fittings.
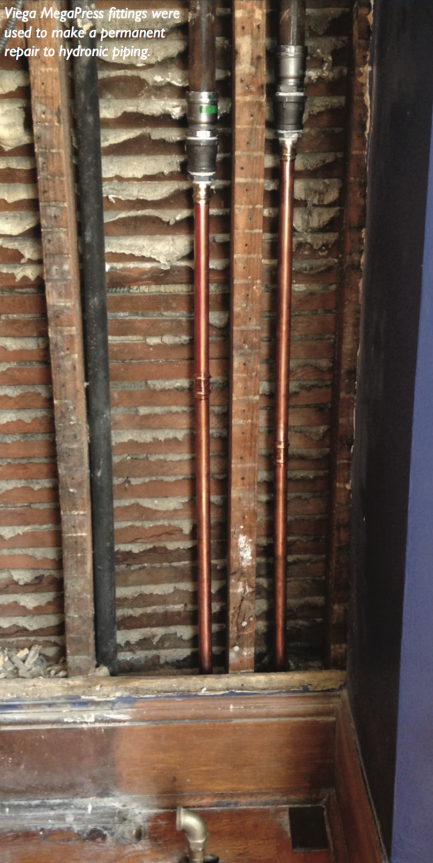
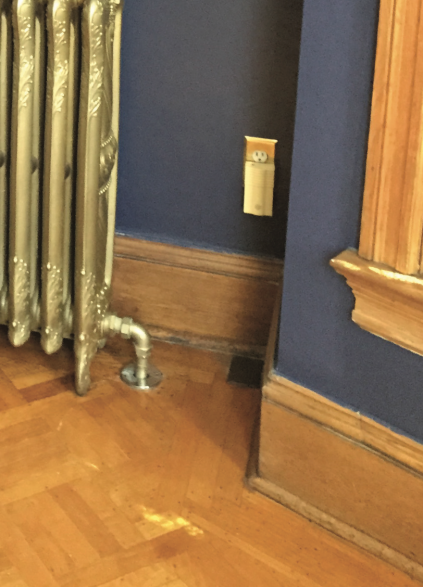
Brian’s solution created a solid, permanent repair to the hydronic piping with minimal collateral damage to adjacent floors, walls and finishes. The press fitting technology also avoided brazing and soldering in tight wall and ceiling cavities around dry, 100-year-old framing. Once the piping repair was completed and the wall was patched and painted, you would never even know we were there.
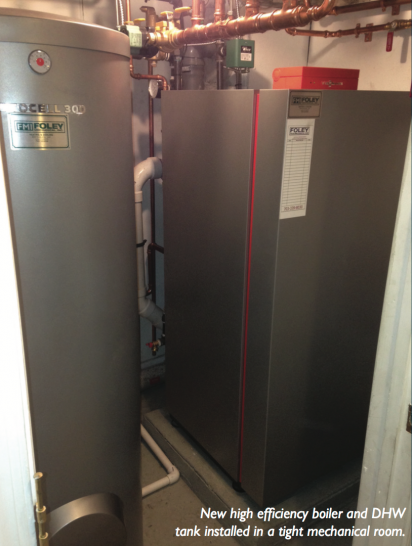
The client was so impressed with Brian’s skill and professionalism in making this repair, he decided it was time to upgrade the heating system. In September, Brian removed the 40-year-old boiler and unreliable water heater. The boiler room was renovated with masonry repair, new walls, and a poured concrete boiler housekeeping pad. The floor was finished with epoxy paint. This is my kind of boiler room!
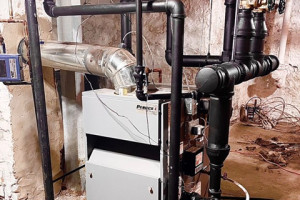
Brian installed a new 95 percent AFUE modulating, condensing gas boiler and an 80-gallon stainless steel indirect water heater. All of the zone controls and boiler specialties were replaced as well. Space was tight but Brian got it all to fit. Since this was a row house with two party walls, boiler venting was a challenge. There was no way to vent to an outside wall. Instead, a Centrotherm PPS flexible liner kit was dropped down the existing chimney flue and connected to the boiler to resolve the venting issue.
Having the right tools for the application solved a difficult problem. Brian’s technical ability and creativity were equally important here. The client is thrilled and can’t wait for the cold weather to hit this fall to test out his new heating system.
Hello, old friend. I’m writing today to say thanks, and to say farewell. This will be my last column.

My six-year-old grandboy, Brendan, was in the vestibule of the diner when the bubblegum machine caught his attention. It was one of those spiral models that appeared in t...
Subdural posed a question on The Wall at HeatingHelp.com in the Strictly Steam section, where some of the sharpest knives in the drawer post every day. The question was a...