Skip to Content

How to Flush the Return Lines on an Old Steam System

mudleg drain

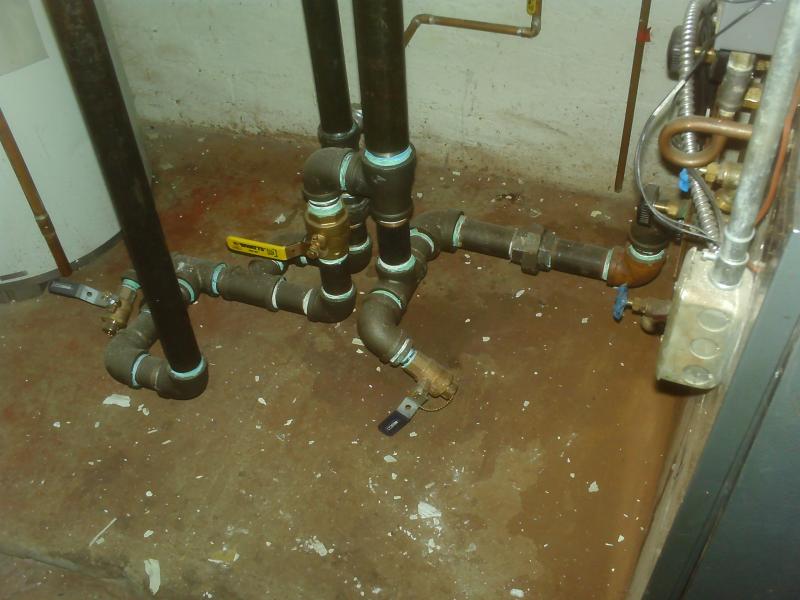
Some suggestions from contractors who post on The Wall:

  1. We use newspaper, red rosin paper and kitty litter. We are as careful as possible, but spills do happen. Because we know this, we also bring along a heavy-duty mop and wringer bucket. This, along with a good floor cleaner, enables us to leave the work area cleaner than we found it. We have found most clients are pleasantly surprised by our effort to keep their floors clean. It makes for repeat business.
  2. If it's not already there, I'll pipe in a boiler drain and ball valve on each leg of the wet return. This allows me to flush the line and direct the mess through a garden hose to a safe place outside the building. The cost of the few fittings is worth it. It shows customers that you care about their system and keeping their home clean. On new boiler installations, I install the boiler drains and valves as part of the installation.
  3. I would suggest a couple of ideas. Fit an adaptor to connect a pump discharge hose and run it to a safe location. Maybe hire your local drain cleaner with a water jetter and big sucker truck.
  4. A lot of speedy dry, a good vinyl tarp and a wet vac do the trick. Even better, change those old drain valves to full-port ball valves and give it a good flush.
  5. We use a big shop vac to suck out the water as we flush the return out. Just make sure you have a safe place to empty the vac because that will make a mess, too.
  6. Attach a garden hose at a hose cock to an outside drain.
  7. What we have done with one system, an old school built in 1911, was to use a sewer-rooter service. The man inserts the cutter of the correct diameter and cuts out the crud. As he pulls the cable back, we wipe it with a rags, and as the glop is pulled out finally, we pull it into a ring of rags, weaved loosely together to make a well. Then we suck up the mess with a wet/dry vacuum by introducing some water as we go to make the crud into a slurry.
  8. If you have a really big job as we did some time ago, think about hiring a sewage service company. The vacuum is so strong that the operator can hold the nozzle at the pipe opening and suck the crap up before it can even leave the area. Also, because the truck suction is designed for semi-solids, it will take just about anything that is wet and can cause a vacuum at the nozzle to occur. It does not do a good job on dry material, however, and you have to wet down any friable material for it to be taken.
  9. One person I know used the ring off the diamond drill (the ring that takes away the water as you cut). He used a vacuum on it, and it worked well as long as it was made into a fairly watery mess. Any way you do, it is a lousy, dirty, crummy job – just the sort we all like to do, especially if you have a mouthy helper! 
  10. We try to talk them into new piping below the water line, which costs about as much as a thorough cleaning will. Barring that, we'll either use heavy plastic to capture the boiler "ink" or a shop vac to keep the mess contained. New piping is the better method in most ancient replacement cases, and a cloth rag or duct tape stuffed in, or taped over, the old opening helps avoid the old age dribbles. Better yet, we invite their kids to the basement for finger painting on the plastered rec. room walls!
  11. I’ve come across this many times. I started by draining out the boiler (I'm assuming that there is no drain cock on the return, right?). Next, I'd break the 'L' at the Hartford Loop, put in the suction hose from a Pony pump, and suck out whatever you can. Now the options occur: Option1: If there is enough play to pick up the return at that end, I'd do so, place a brick or something under it to give it some back pitch, crack the fitting, remove it and install a heel-tee with a drain cock and reconnect and continue with the job. Option 2: No play in return (underground)? This is a pain. I'd chop the concrete or cut the floor just enough to expose the fitting and remove the debris all around the riser coming up from the floor and remove that riser by cutting a notch at the threads, removing it, collapse the threads in the fitting, unscrew the riser and installing a shorter riser with a tee and a drain cock. Option #3: If the return is horizontal, but has no play, such as it won’t if it passes through a partition, and there is room, I'd crack the tee and use the riser that went to the Hartford Loop as a lever, I’d pull down, making that vertical piece horizontal, and use gradually smaller (in height) receivers such as roasting pans to get the water out. So you would pull down, catch some water until the pan fills, then push it vertically, dump the water and then repeat as necessary. Usually a few old towels at the very end are all that you’ll need. Now naturally,you have to inform the customer that whenever you have to crack a fitting it might damage another part of the return, but if that damage does occur, the return needed replacing anyway. Now, when I talk about "cracking the fitting" I'm saying to hold back against the force of the striking hammer on the opposite side of the fitting with a heavier hammer. You know, for inch and a half and smaller, a 28-ounce hammer with a three-pound back-up works well. If the return is larger, then hold back with a sledge. The idea is to only create a crack in the fitting, not to bust out a piece of it. Just enough to produce a hairline crack, and then it will not offer any resistance. Hope this helps.
  12. If we need to avoid any spillage at all, we cut a piece of 6-mil heavy plastic to fit in the area. We place it so it goes up any walls to a few inches in height and extend it out a more-than-adequate distance, based on the most water we estimate could spill or splash. We always put plenty to play it safe. We buy the 6-mil plastic in 20' wide x 50' or 100' long rolls and cut off whatever we need. We can sometimes use the plastic more than once if it hasn't been cut in a bad spot for the next job. Some small cuts can be taped to be damp-proof with duct tape. Then we cut a line into the plastic to where any penetrations come out of the floor and make some crisscross cuts there, being careful to make the outside diameter of these cuts a little smaller than the penetration so it fits tightly and we tape it in place. Duct tape works well. Then we put down some absorbent rags around where we will open the pipe. We always keep a plentiful supply of rags in the shop and on every truck. We bring extra when we know were going to do a job that requires them. Before we open the pipe, we make sure we have more than enough catch buckets ready to handle the flow, and we plan where we’re going to dump the buckets, and we make sure we have a clear and protected path to that spot. And we always do this with a two-man crew so that we have an extra pair of hands ready to keep the job as neat as possible, and to help swap out the full buckets for empty ones. Also, we don't fill the buckets all the way to the top to prevent spillage. After we're done, we dry any spillage and our boots before we start walking around, we clean up, and voila, a satisfied customer is usually the result.
  13. At the union or elbow, break apart the pipe and using the elbow and nipple, raise the pipe up so it can drain into a bucket. Use a shallow pan and pump if the return is very low, or simply replace the return with new pipe and save yourself the headache.
Categories

Leave a comment

Related Posts

Freezing Univentilator Coils

I had written a story for Plumbing & Mechanical a while back about a fella in Canada who sent me this email: "Our problem is that five out of hundreds of univentilator co...

Published on 05/08/2023 3:15 PM by Dan Holohan
Posted in Steam Heating
near boiler piping
Dry Steam Is The Goal

I love all the advances taking place in the world of hydronics, but I’m still seeing plenty of steam systems out there in our older cities, so knowing about dry steam wil...

Published on 03/01/2023 10:29 AM by Dan Holohan
Posted in Steam Heating